Elise Loprete aka The Poor Girls Pantry has been kind enough to share with us a step by step guide to creating a stylish and delicious festive grazing platter.
There’s no doubt that the festive season is the best time of year. People come together, joy is all around, and the food… oh the food is abundant! So why not do something a little different this party season and add a little more style and flair to your festive spread.
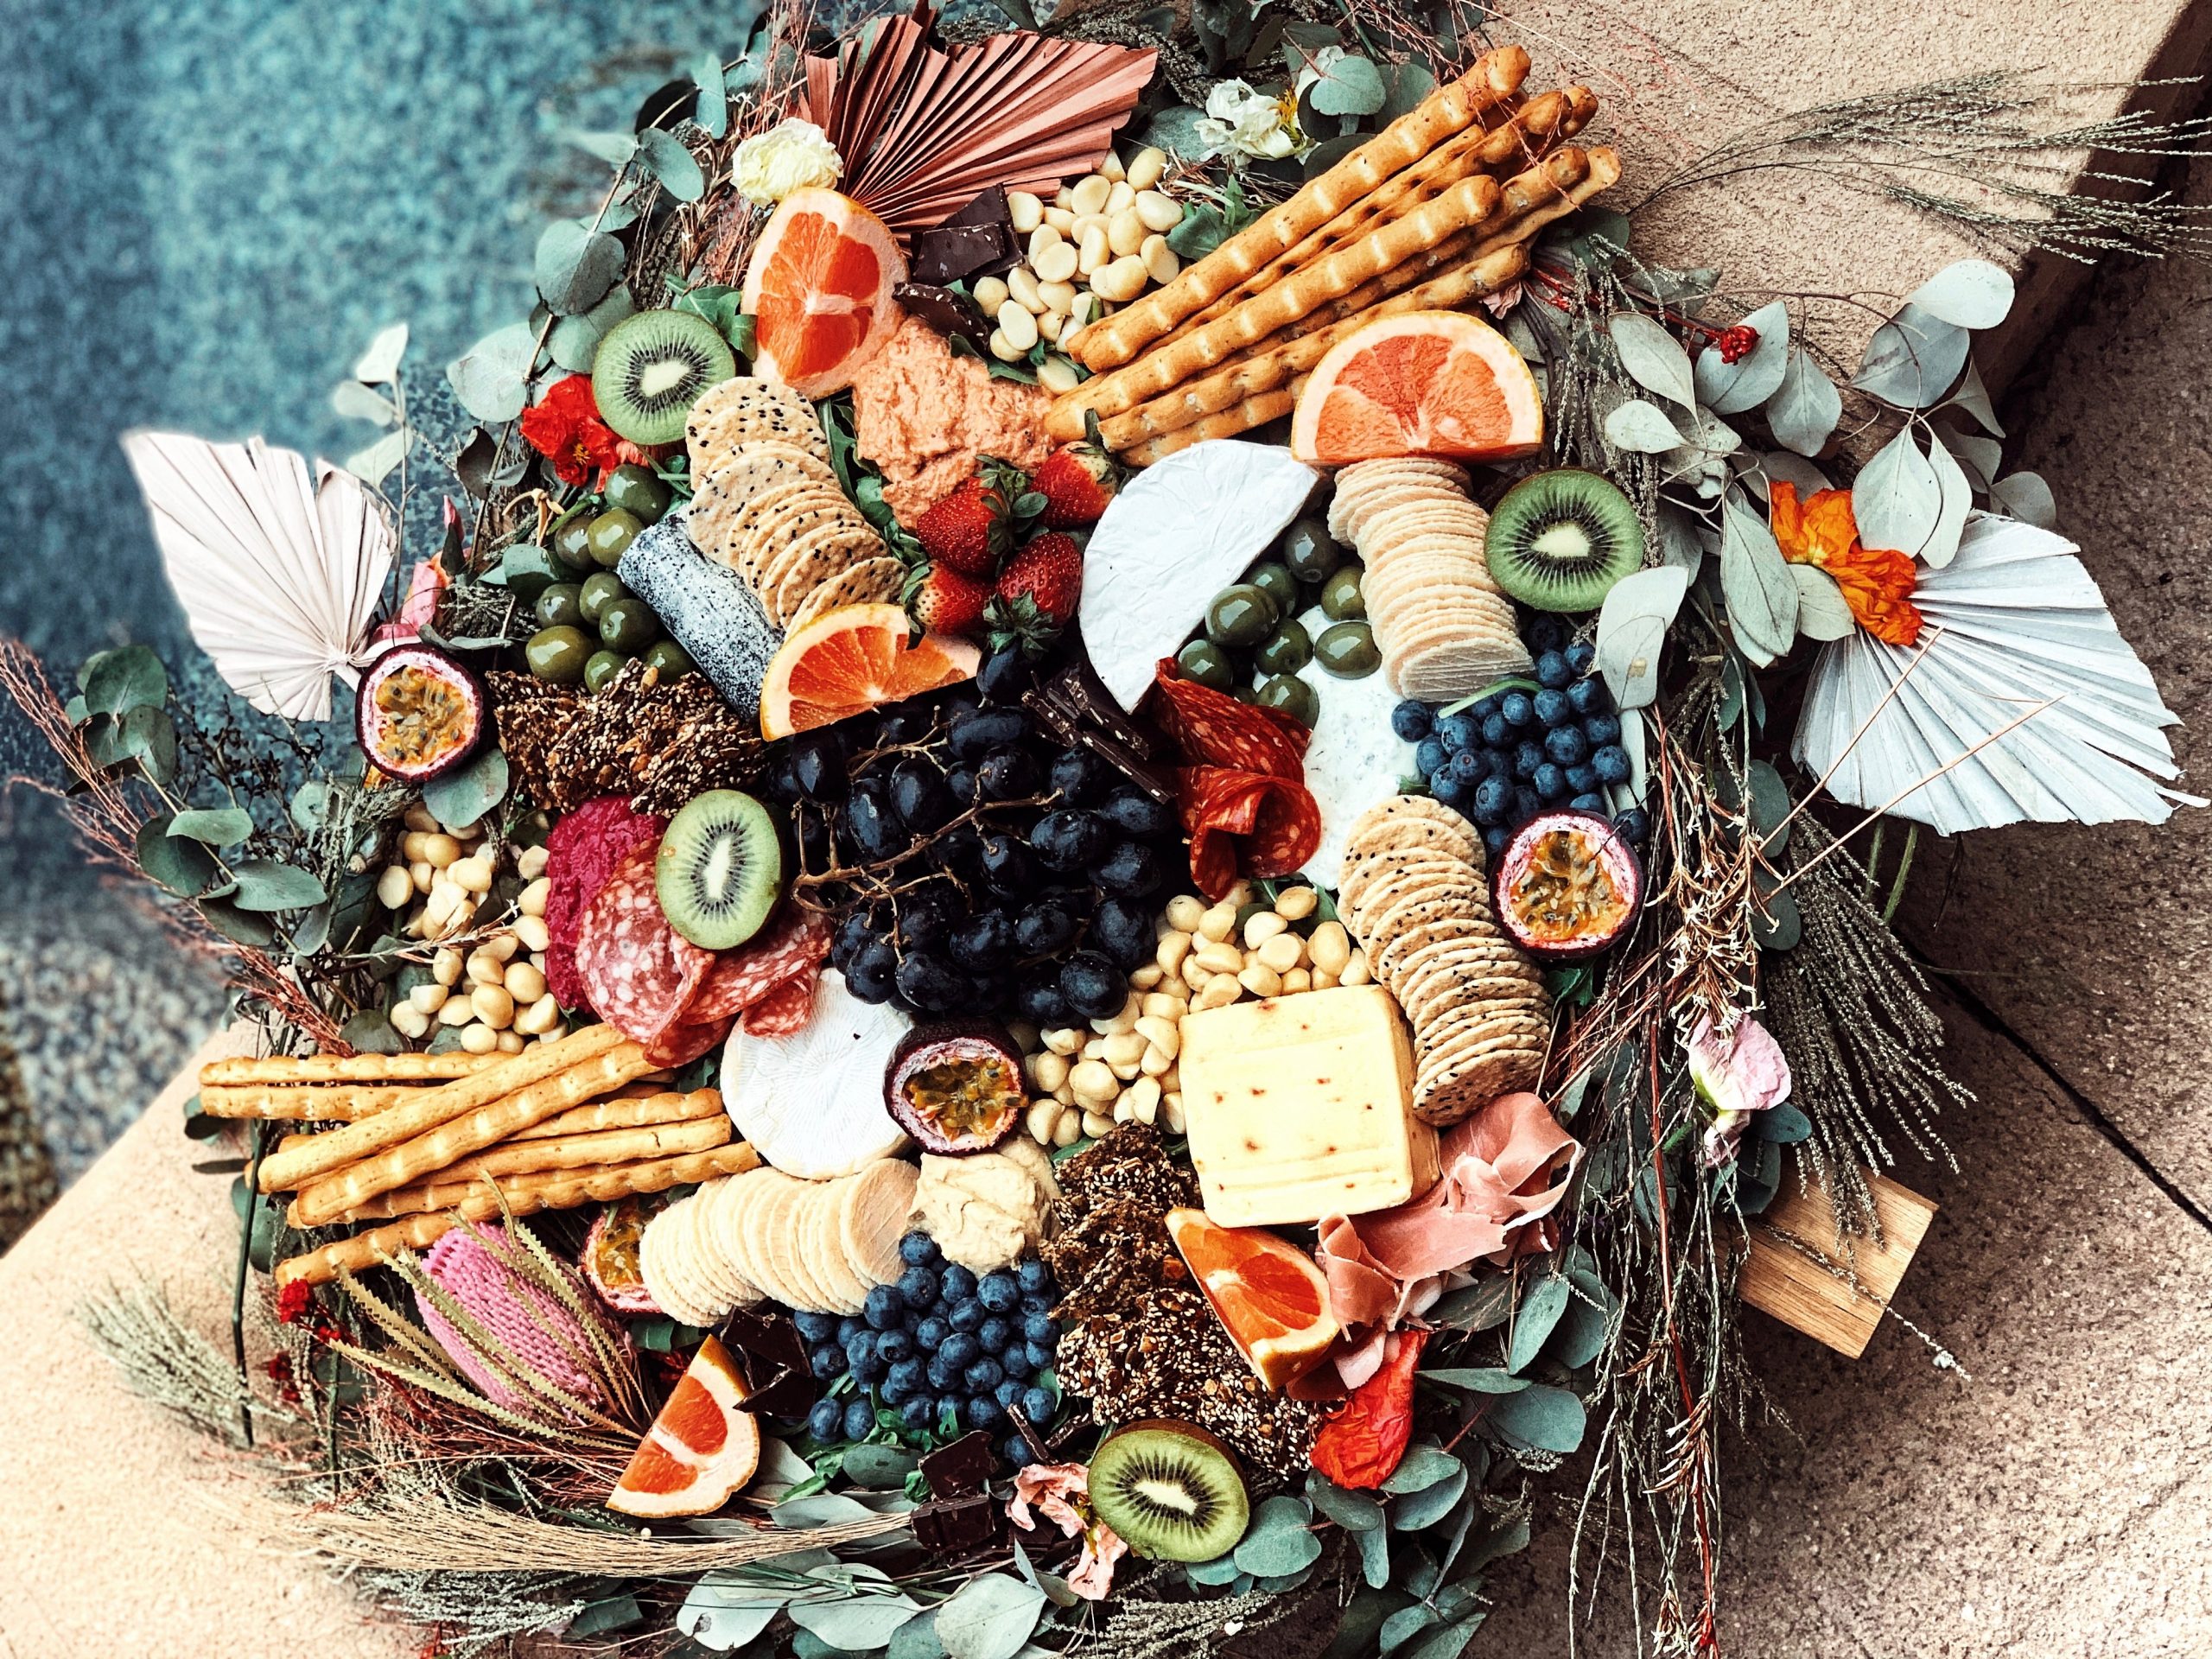
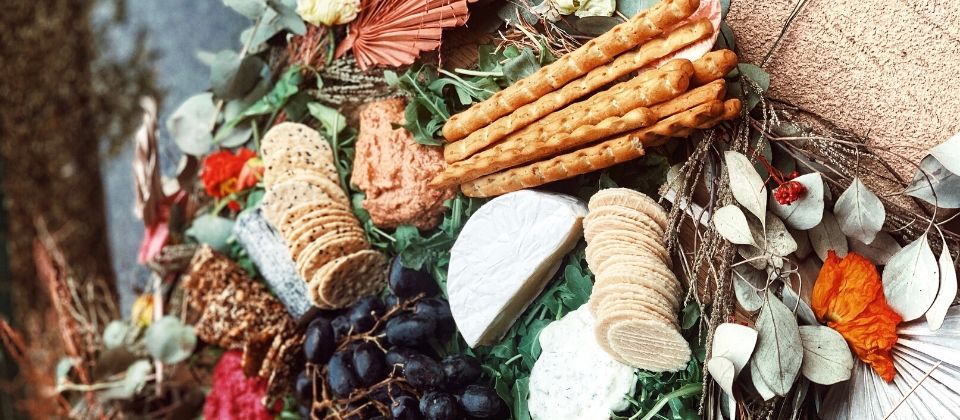
Elise from The Poor Girls Pantry in Byron Bay is famous for creating amazing grazing tables. You can check out some out her stunning creations on Instagram here. To help us all achieve something similarly incredible this Christmas, Elise has prepared step by step instructions for an exquisite festive wreath to place around the rim of a platter to create the ultimate festive style.
“Not only does this look amazing, but it is so easy and so much fun to create” says Elise. See below for all the details, including how to shop for and style some delicious goodies so you too can easily execute this stylish festive party platter for your next party or event.
What you will need
There’s a few things you will need to create your festive platter.
For the platter
- 1 platter tray with wide rim (we used a 55cm wide tray, a large, round wooden board is ideal)
- 1 chopping board
- 1 sharp knife
- 1 tablespoon
- 1 garbage bag
- 1 recycling bin or box
- 1 roll of paper towel
- 4 cheese knives
- 1 packet napkins
- Plates to serve
For the wreath
- 1 roll of twine
- 1 packet of zip lock ties
- 1.5m thin metal wire (available from ??)
- 1 pair of scissors
- Flowers
Shopping list
Elise says, “with copious presents to buy, and mouths to feed, I have tried to create a smallish shopping list that will create a delicious platter while still sticking to a realistic budget. Conscious food styling is the key, it’s all about choosing quality ingredients and using them wisely. If food is created with love and good ingredients, everyone will enjoy it!”
The below shopping list is what you’ll need to fill the inside of your wreath. (For about 15 people).
Platter ingredients
- 220g rocket (arugula)
- 4 cheeses of your choice (tip: buy different varieties, i.e brie, smoked gouda, blue cheese and goats cheese)
- 4 dips of your choice (tip: colour is key here, I like to buy dips that are bright and full of colour.)
- 400g black or red grapes (tip: green grapes don’t work as well)
- 4 packets of crackers (tip: buy a variety, i.e wafer, rice, wheat and artisan crackers)
- 1 punnet each of strawberries, raspberries and blueberries (tip: if you don’t like berries, cherries are a great alternative)
- 1 block (roughly 80g) dark chocolate
- 50g semi dried tomatoes
- 50g mixed olives
- 100g macadamias
- 1 grapefruit (sliced into quarters)
- 2 kiwi fruit (sliced in half)
- 2 passionfruit (sliced in half)
- 2 x 50g cured meat (optional, I like to use salami and prosciutto)
Flowers
Creating an appealing platter is all about the flora. It is just a plate of food without afloral element! Not only do flowers bring colour and life to the plate, they also tell a story. Floral choice is important so take time and care selecting beautiful flowers. You will need to purchase four different types of flowers to create your wreath.
- 1 bunch of eucalyptus gum
- 1 bunch of baby’s breath
- 1 bunch of poppies
- 1 bunch of mixed flowers that fit the colour scheme
Building your festive wreath
- Begin by creating the wreath base. Using the metal wire, wrap it around your platter tray (forming a circle with a bit of extra room), so you’ll know how big to make the wreath and it will be able to fit around the tray nicely. Using a zip tie, tie the metal wire together, so the circular formation is intact.
- Grab a small cluster of your bushier leaves (i.e the eucalyptus gum). Attach the stems to the metal wire circle by zip tying them onto the wire. Repeat this process until all the metal is hidden. Make sure all of the stems of the base are flowing in the same direction.
- The next step is to fill in the gaps with different whispy or bushy leaves such as baby’s breath. Use the same process as above for the first bunch, however these flowers can be unevenly placed within the gaps to create texture. I would do one cluster in the centre at the top, and then two below on each side, creating a triangular formation. This does not have to be symmetrical, so don’t stress.
- Your next step is to bring in some elements of colour. Scatter your first lot of larger flowers throughout the wreath, and zip tie them to the leaves that are already in place.
- Repeat the process above with your last batch of mixed flowers. When selecting this last bunch it is ideal to choose one that has a variety of different textured flowers in it. Let your creativity take over. Place the flowers in different areas and clusters and once you are happy with how it looks, begin to zip tie the last flowers to the wreath.
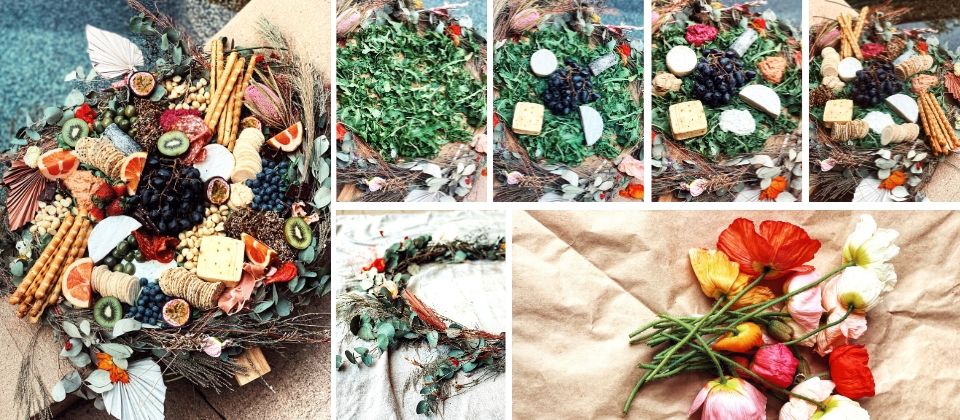
Building your platter
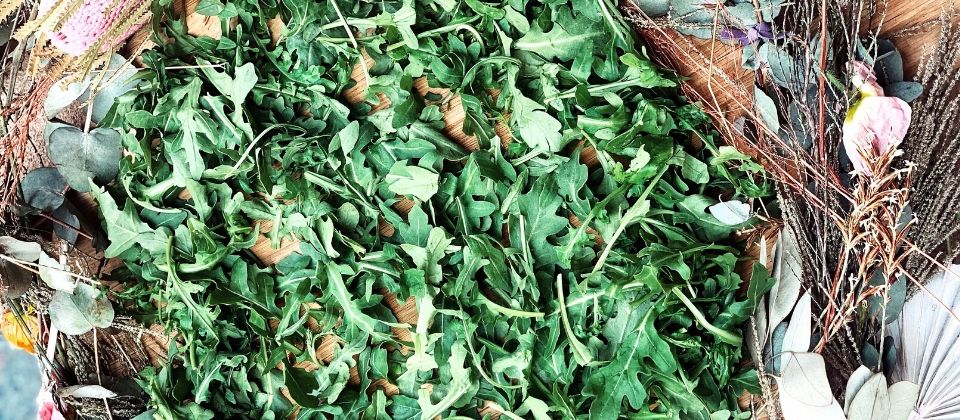
- When creating your festive grazing platter you can either first place the wreath around the platter and then start building the platter OR you can create the platter following the below steps and then place the wreath around the platter at the end. Spread the rocket (arugula) evenly over the base of the tray.
- Place your grapes in the centre of the tray then your cheeses. A top tip is to place the cheese in a north, south, east and west formation.

- Once your cheese is placed, scoop out your dips and place between the cheese.

- Begin to weave your crackers in different areas around the cheese and dips. Please note that you may not be able to fit all the crackers on, so leave some and refill later if needed.
- Once your crackers are in place, begin to fill the gaps of green. I like to start with the semi dried tomatoes and olives.
- Then place in the rest of the grapes, macadamias, berries and chocolate (break up your chocolate into small, rustic pieces).
- The next step is to roll your cured meats up loosely (not tightly!) and place in any small gaps wherever you can. Fill, fill, fill!
- Spread out your grapefruit, kiwifruit and passionfruit as garnishes, on top of everything, and in any small gaps that you can find.

- Once the platter aspect is done, if you haven’t already, it is now time to place the wreath on the rim of the tray. Do this very carefully.
- Scatter any excess flowers throughout the platter, to give it an extra pop.
And you’re done! Serve immediately. Please note that it is best to keep your platter out of direct sunlight, and don’t leave it out for too long if it’s a hot day. Enjoy!